Machine Reverse Applique: with or without Appli-quilting

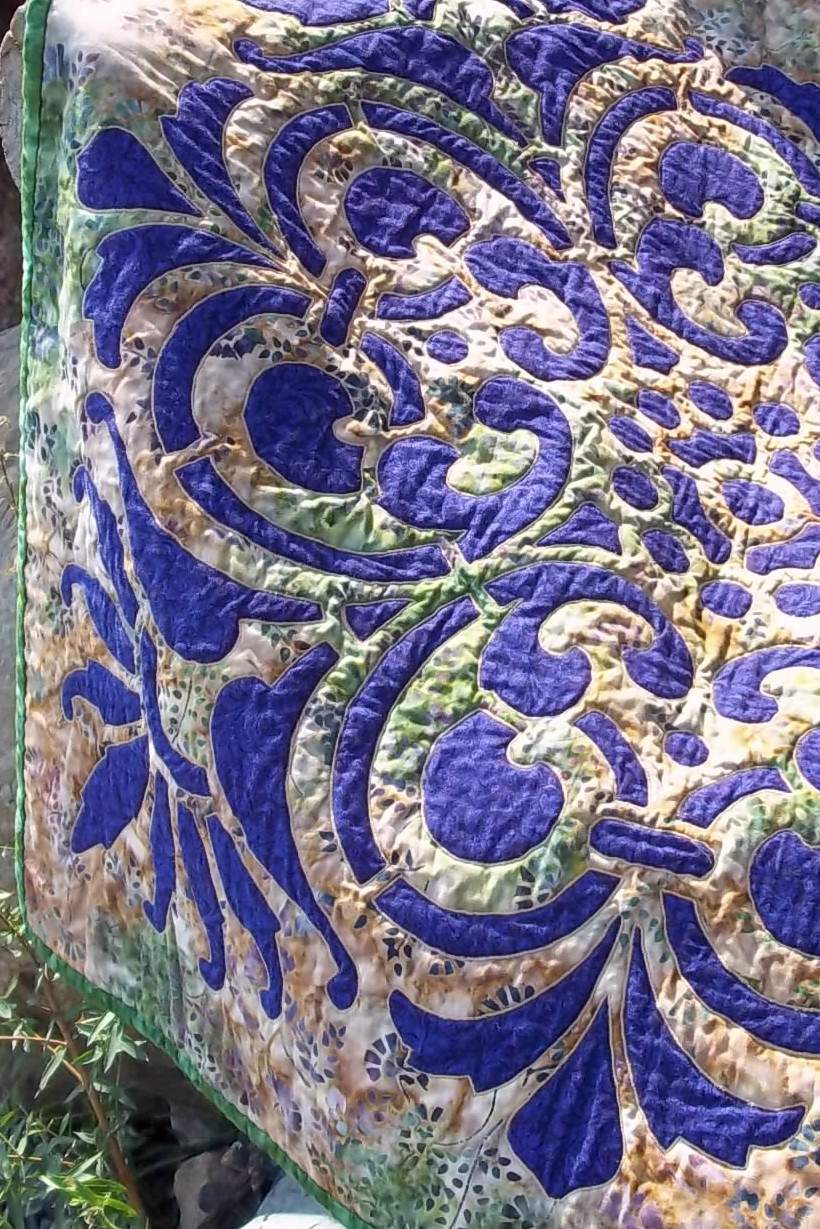
Radiance, Medallion V. Machine appli-quilted
Getting ready:
Select your fabrics and cut to the needed size.
The nice option of machine reverse applique, is that you may use a dark background. This option is available because you do not need to be able to see the pattern through your material as you are tracing onto your fusible webbing. Check out our Scroll & Fan, medallion III pattern done by machine.
1. Trace:
Layer your paper backed fusible webbing on top of the paper pattern.
Pin or tape together. Trace around all the shapes in the design with a pencil. (see picture below)
A light box makes this step easier.
I like to use Soft Fuse fusible. But any fusible material that you like works.
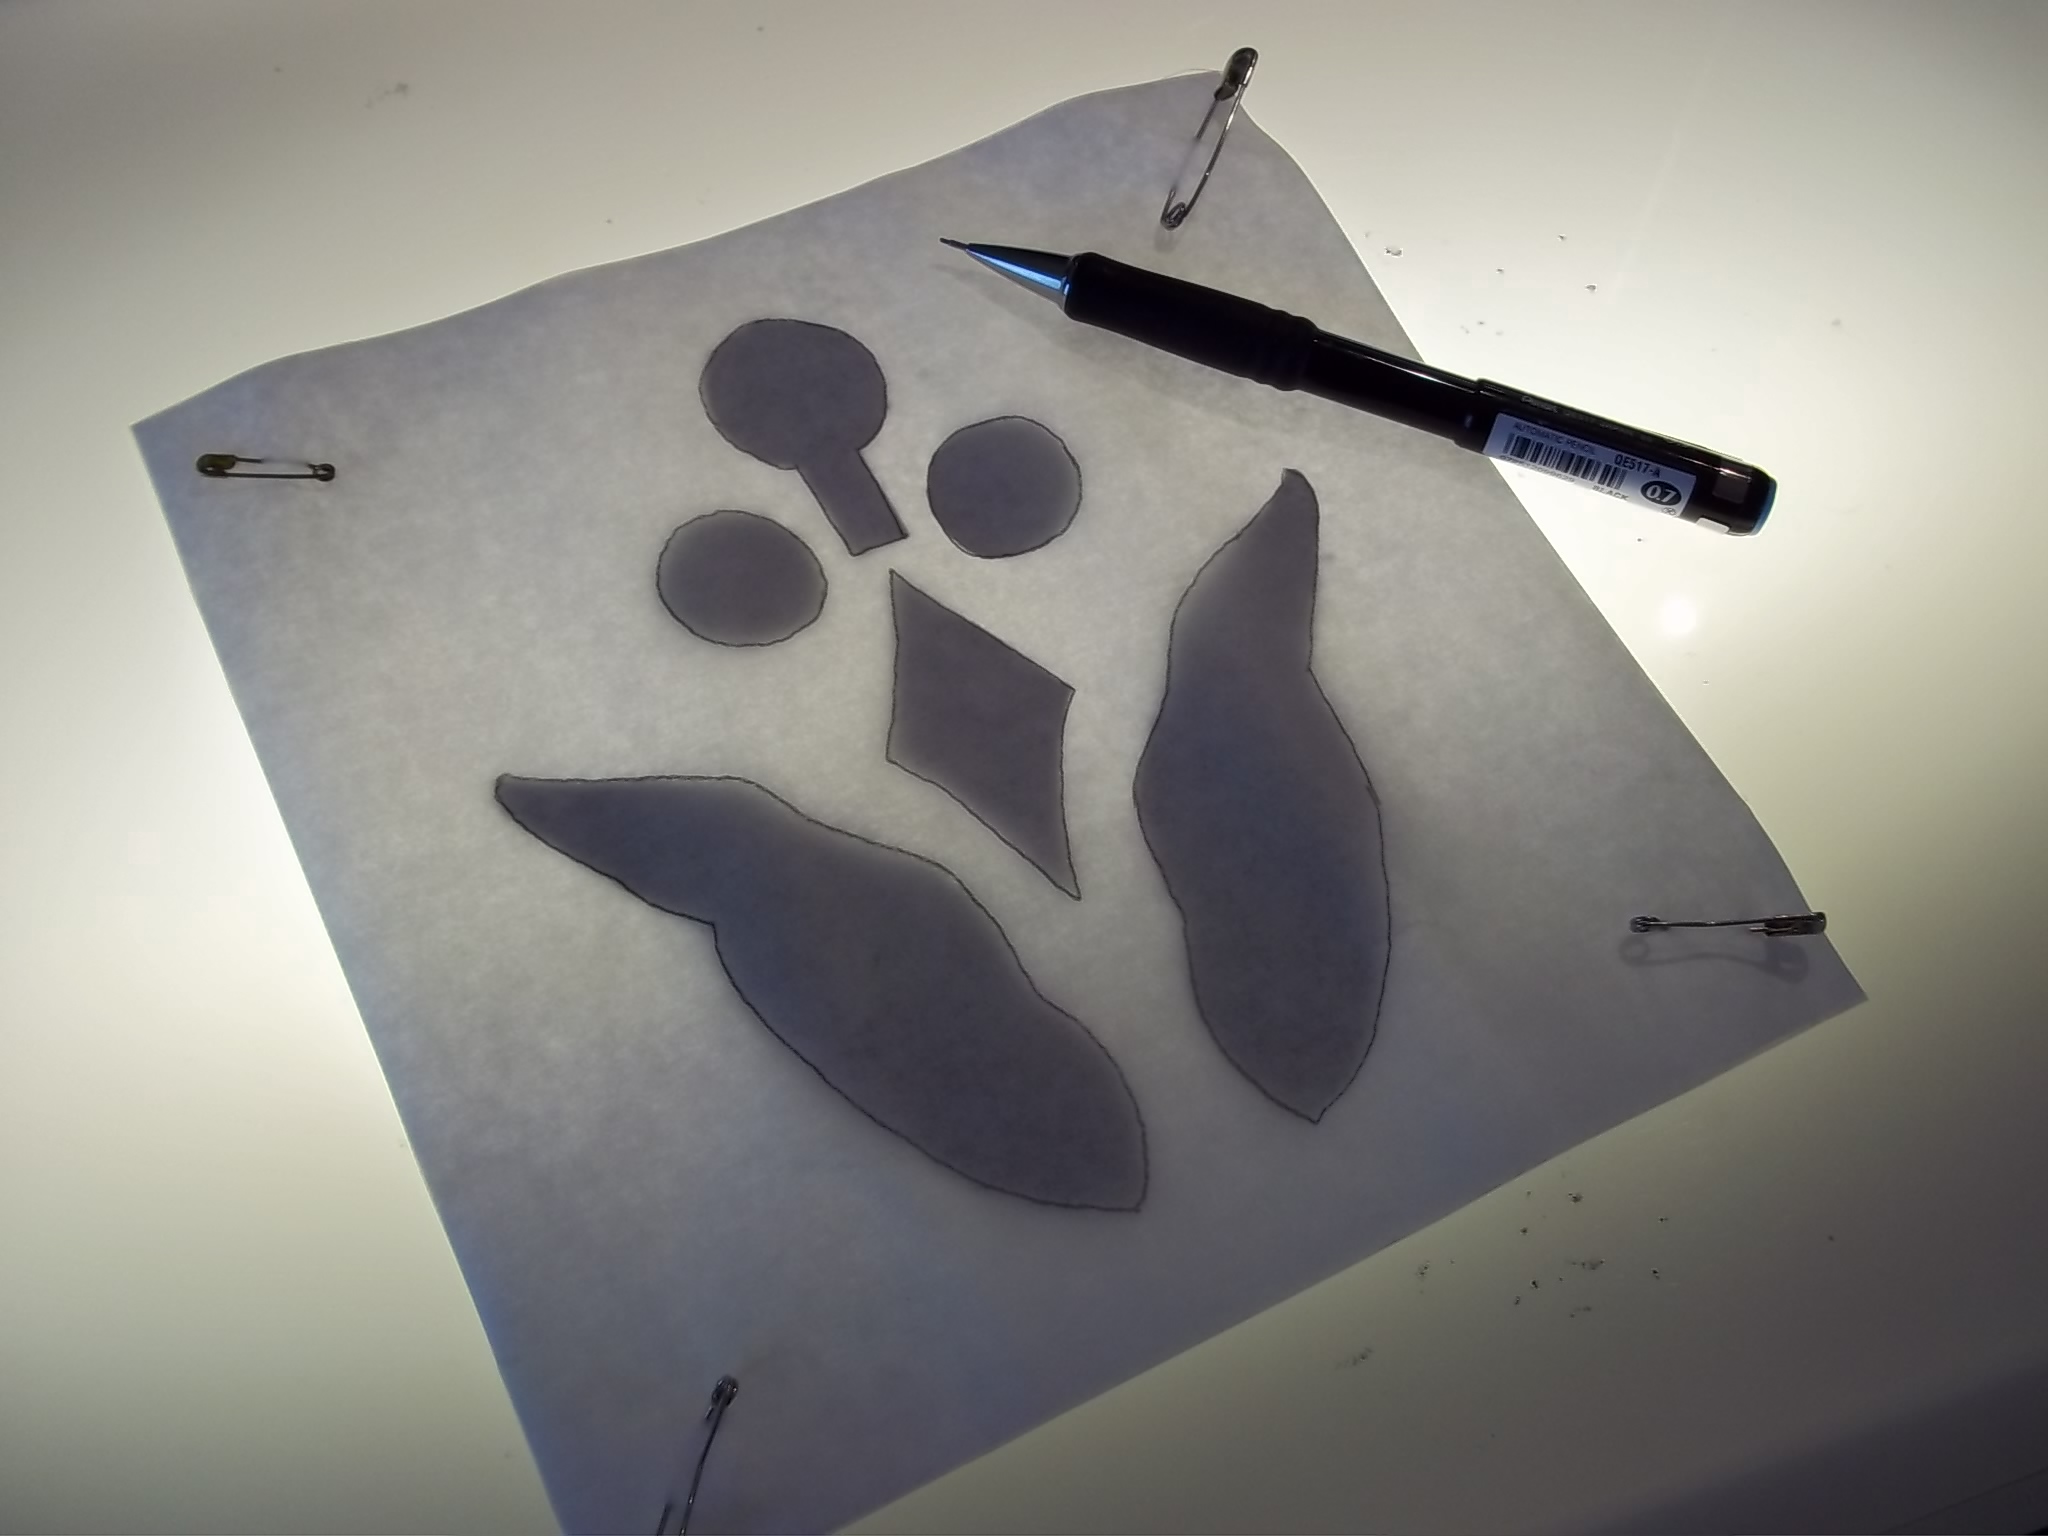
1. Trace pattern onto paper side of fusible webbing
Lay onto the wrong side of your top fabric and iron following the directions for your fusible webbing. (See picture to the right)

Snip: cut out the shapes in the design.
Scroll & Fan, Medallion III
What I like about Soft Fuse is it is light weight, yet adheres well. When my quilted piece is finished it is not stiff, but supple.

Iron onto wrong side of top fabric.
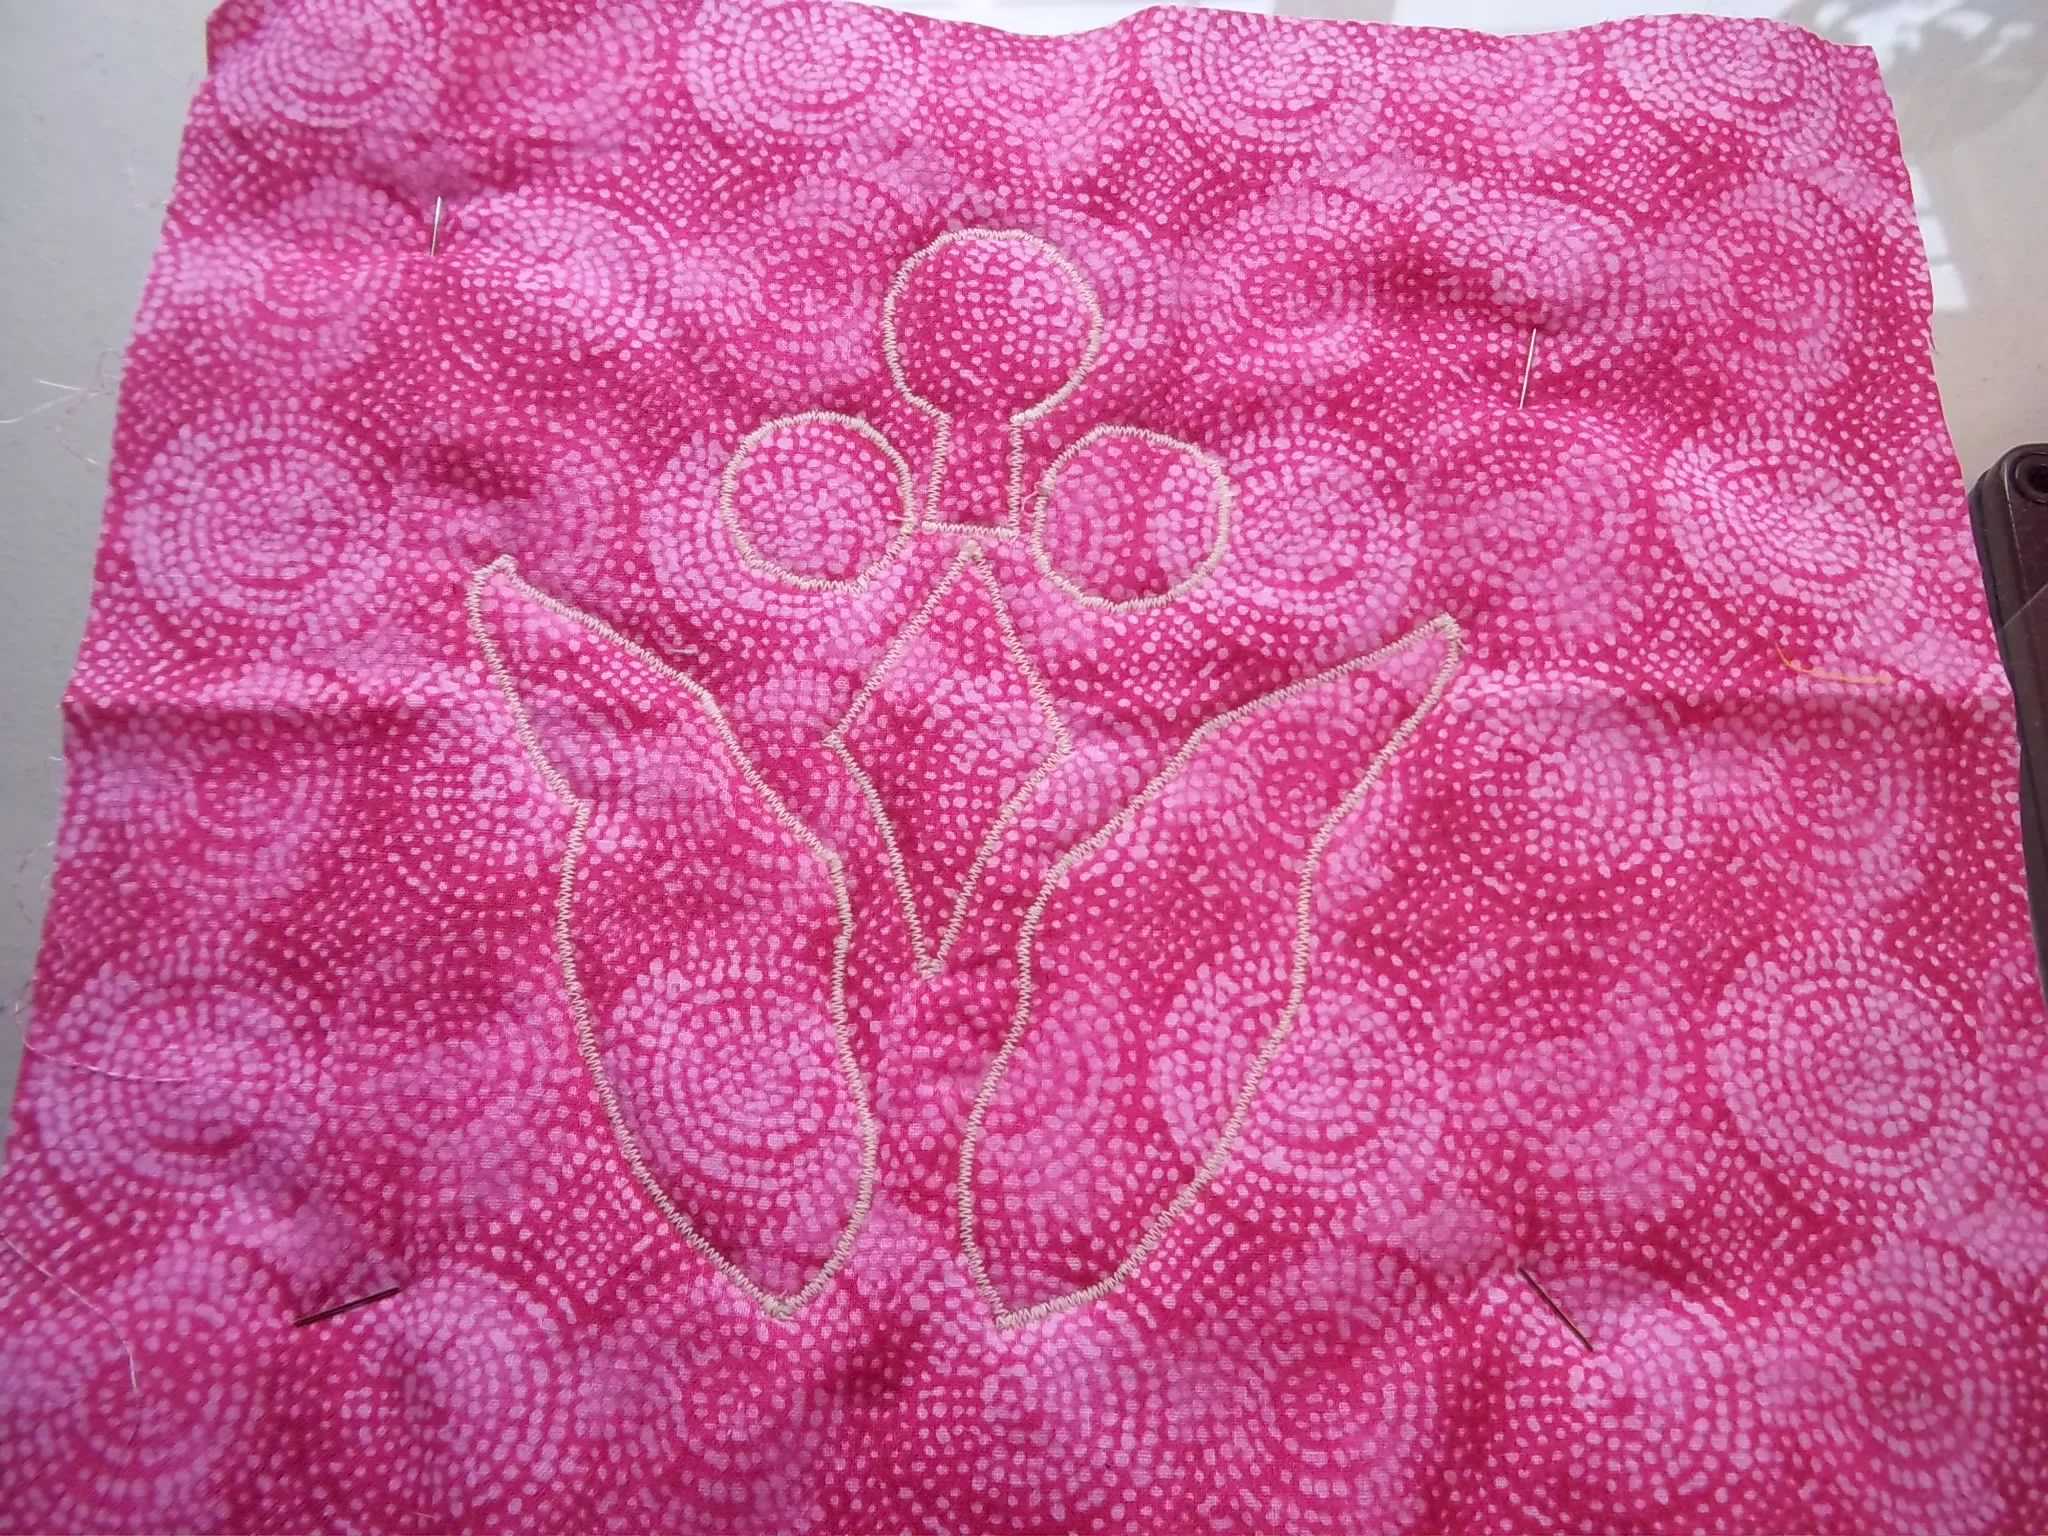
2. Snip
Using small sharp scissors, cut out the shapes in the design on the drawn lines.
(See picture on the left)

Iron onto your background fabric.
3. Iron
Peel off paper backing.
Lay your fused top on the right side of your background fabric.
Iron, following directions for your fusible webbing. (See picture to the right)
4. Stitch:
Once the layers are fused, you are ready to consider whether you want to machine applique -stitching through your two fabric layers, or try our Appli-quilting option - applique and quilt in one step. Which ever option you choose, how I stitch is the same.
I would go to my machine and select my stitch, and sew so I cover the raw edges of the design.
I prefer the look of a satin stitch, but you could certainly use a blanket stitch or do raw edge applique. Every machine is different, so have a scrap of fabric handy to experiment with your sewing machines stitch width and length to get the desired look.
- For the satin stitch begin with your zig-zag stitch and adjust your stitch length and width.
- For blanket stitch, should your machine have that option, adjust stitch length and width.
- Raw edge is simply a straight stitch within 1/16" - 1/8" of the raw edge. You may want to increase the number of stitches per inch.
I generally use a thread that is the same color as the top fabric, but don't be afraid to use a contrasting color. You can get some lovely results that add just a pop of color.
Machine Applique or Appli-quilt
If I'm adding my piece into a quilt, I would machine applique once my top is fused onto the background. I often treat my fabric with Terial Magic liquid stabilizer to give more stability to my fabric. This would reduce or eliminate puckering, bunching and rippling of the fabric while you machine appliqued. You may also use any stabilizer you like. Simply put, I would go to my sewing machine and stitch around the raw edges of the design with my preferred stitch. Once machine appliqued, trim your piece to the correct size for piecing with the other quilt top components.
However, if the piece will be its own quilted decoration, I Appli-quilt. Appli-quilting is machine applique and quilting in one step (continue reading for more information). I layer with my batting and backing now. I always layer with extra batting and backing, and trim to its finished size later.

Piece layered with batting and backing.
In the picture to the left, my piece is layered with batting and backing, and pinned to keep the layers from shifting while Appli-quilting.
You may also hold your layers together with spray adhesive if you prefer.
The piece is ready for the sewing machine.

Stitch with Appli-quilting.
APPLI-QUILTING
Choose threads that augment your fabrics.
You may want them to match exactly so they disappear, or you may want to choose a complimentary or accent color.
I like to use my sewing machine's satin stitch. You can create one with a small, tight zig-zag stitch. Or use the blanket stitch if you have one on your machine. I don't have one on my 29 year old machine.
Now, appli-quilt...Machine applique and quilt, in one step, through all your layers. (See picture above)

Machine Appli-quilted from front.
Machine appli-quilted from the back
Your piece is all appli-quilted and ready for binding. Finished quilted piece from front (See picture on far left), and viewed from the back (See picture on immediate left).
Check out our Workshop page for a hands on workshop in your area.