Bindings, Part 2: Mitered Bindings by Machine
Adding a binding is the finishing touch, the final colourful frame, to your quilt, whether it be a bed-size quilt, a wall-hanging or a table runner. Sometimes I square up and trim my piece before I sew the binding on, and sometimes I sew the binding on first. If I started with a larger amount of fabric than the finished dimensions or if my stitching and quilting has pulled the piece out of plumb, I will definitely trim first before binding.

When making a Radiance Medallion V sample that I'm using as my example for this tutorial, I chose to bind first and then trim.
I've already made my binding. (See Tutorial for Making Continuous Binding.) My sewing machine is threaded with a color that matches my binding fabric, and I have my 1/4" presser foot on my machine.
If you want to learn how to finish your binding off as a continuous binding, also read the blog, “Binding Update: Sewing a Continuous Binding” (posted 6/2/2021), in the tutorial section of our blogs. You will start and end the machine sewing of your binding differently than presented here. All other information presented in this tutorial is important to sewing on your binding with mitered corners by machine.
I usually start my binding in the middle of the bottom of my piece. Starting with my angled end, I align the raw edges of my folded binding strip with the raw edges of my quilt top.
Sewing binding on: Finish along raw edge of top.
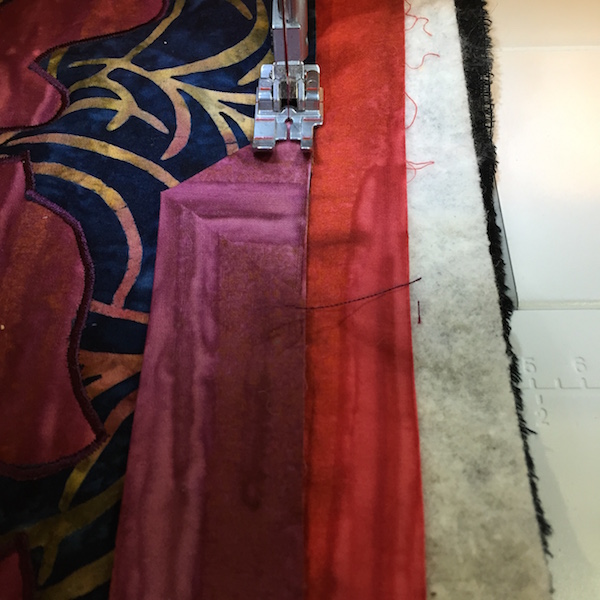
I sew with the right edge of my presser foot aligned with the raw edge of my binding. I don't tend to pin my bindings on, but you certainly may want to. My sewing machine has dual feed, so the top and bottom of my piece pull through the machine evenly. I align a section, stitch it, and then align the next section and stitch, until I've worked all the way around the quilt edge.

Sewing binding on with 1/4" seam allowance.
When I get to a corner, I stop 1/4" from the edge and backstitch to secure the thread.

Stop sewing 1/4" from the end.
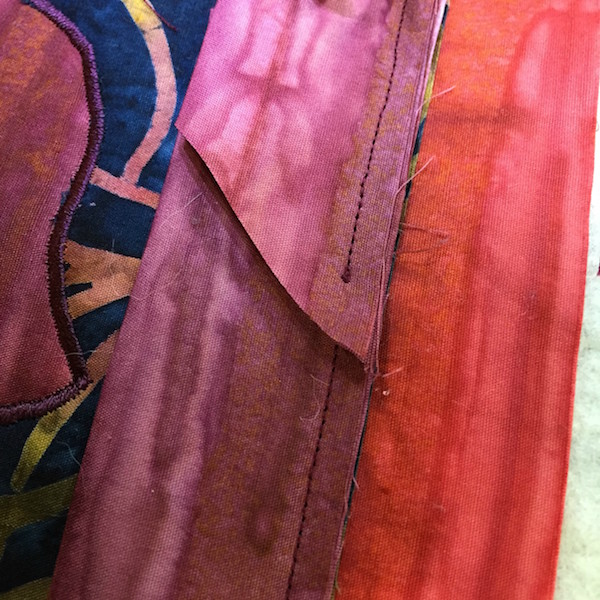
I turn my top a quarter turn. Align the binding strip with the raw edge of the quilt top on the new side, folding it in the corner. This creates a 45 degree angle under the un-sewn strip.

Fold the other side back.
I position the piece under my presser foot, lining up the right side of my 1/4" presser foot with the raw edges. Sew, backstitching as I begin.

Sew, backstitching as you begin.
I continue in this way until I've done all four corners and all four sides.
As I get to the end, I sew, overlapping my binding to approximately 1/4" past the 45 degree fold of the beginning of my binding strip.

Create a 45 degree overlap at the start
I cut the excess binding off at a 45 degree angle.

Cut excess binding off at a 45 degree angle
Trim the excess batting and backing the scissors or rotary cutter and ruler. Trim right to the raw edges of the binding and quilt top.
Before I hand stitch my binding to finish my quilt, I put my sleeve on. ( See blog-Adding a Sleeve for Hanging.)
All done!
To finish your binding, stitching by hand, check out Bindings, Part 3: Hand-Stitching Mitered Corners.